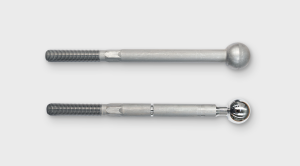
With the new VST 50 machine, EMAG is for the first time tackling a task that is as special as it is demanding: the machining of ball pins and ball sleeves. In the steering or suspension of cars, for example, these components are indispensable. What are the details of the VST 50 and how can extreme chip-to-chip times of less than two seconds be achieved in this field? Read more about this challenge in our conversation with Dr. Mathias Klein, CSO of the EMAG Group.
Dr. Klein, why did EMAG get involved with ball pin machining in the first place?

Dr. Mathias Klein, CSO of the EMAG Group
A major automotive supplier approached us with this task because they wanted to replace their previous machines. These are around 20 years old and, therefore, no longer correspond to the current state of the art in mechanical engineering in various details. So, the question arose as to whether we could solve this new machining requirements for us – and do so with lower “costs per piece” and with higher process reliability. This was the starting point for the development of the VST 50.
What is so special about a ball pin?
First, it must be emphasized that ball pins are actually very common in our passenger cars – 8 to 18 times, depending on the model. And incidentally it does not matter whether they are electric cars or internal combustion engines. Consequently, a great many of these components are manufactured now and will be in the future, and it is a matter of perfect surfaces as well as extreme dimensional accuracy every time. In this context, one can certainly speak of a typical EMAG task.

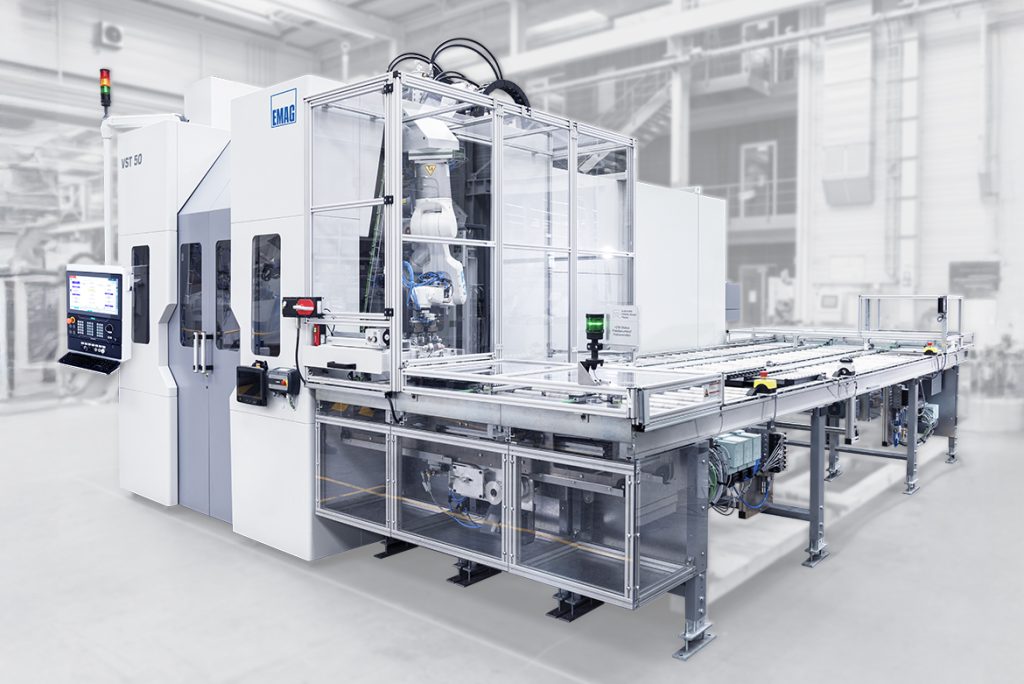
The new VST 50 from EMAG ensures high-speed machining of ball pins. The focus is on high-precision surfaces.
How did you solve the task?
Our overarching objective was to develop a highly automated solution that is easy to operate and at the same time scores points for its special process reliability. This characterizes the VST 50 in many details. For the actual turning of the ball and shaft of the ball pin – which is the focus here – there are two suspended workpiece spindles in the work area that can be moved in combination. Consequently, we can load and unload one spindle while the other is in use during the machining process. The associated compound slide with the tools is, in a sense, divided into two parts. The tools for the ball and for the final finishing can be turned via B-axis for the ball surface and fed via U-axis. Next to them are the tools for the shaft.

Including automation, the VST 50 is designed for highly productive production.
How do the workpieces get into the work area?
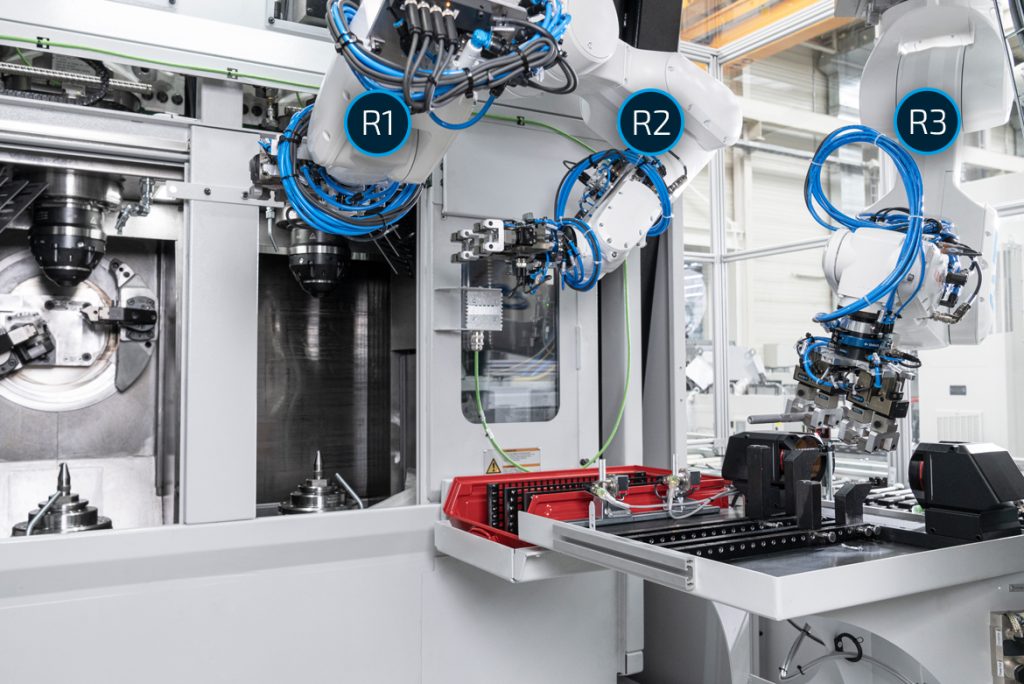
This is the second core of our solution, in which we rely on three robots arranged in parallel – each taking over a different sub-process in the workpiece flow. The left-hand robot transports the workpieces from the transfer station to the left-hand workpiece spindle. The middle robot does the same on the right-hand workpiece spindle, and the right-hand robot transports the workpieces from the transfer station to the outside.

Three robots arranged in parallel take care of parts handling in the VST 50, including tool change and quality control.
Couldn’t this task also be performed by just one robot?
That would be possible, but we would then not achieve the extremely short cycle times we are aiming for. Our solution ensures that a finished workpiece leaves the machine every seven seconds and the chip-to-chip time is less than two seconds. In addition, all handling is “defined.” This means that the components are not dropped in any way and damaged in the process.
How does the tool change take place?
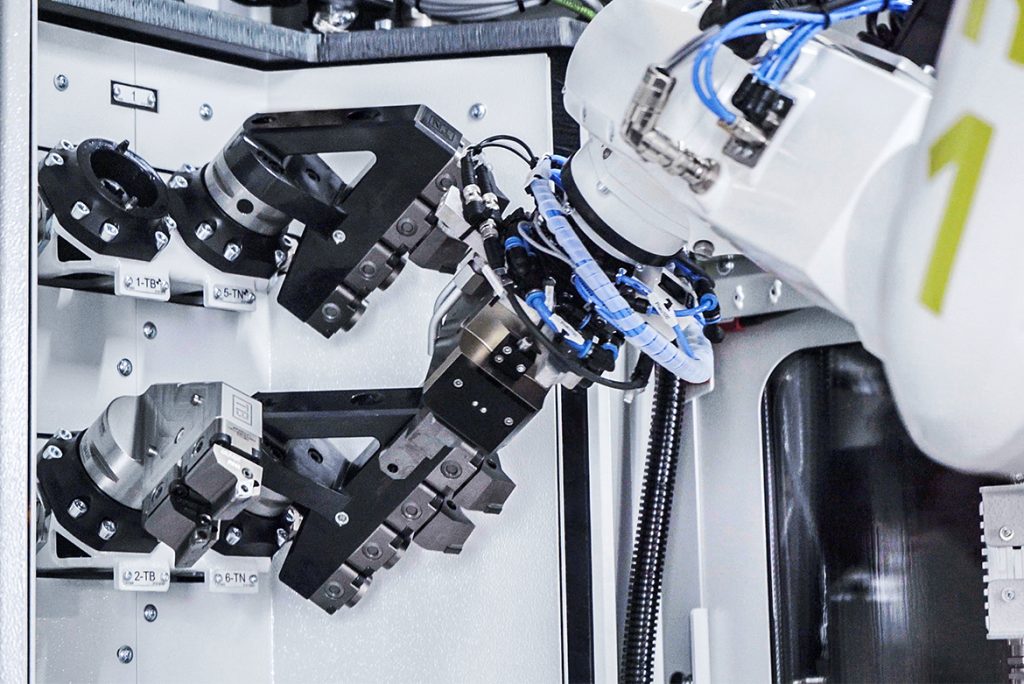
First, it is important that the VST 50 makes a prediction about the tool change on its panel. So, this is where the operator can see if the next change is already coming up. If this is the case, he simply presses a key and one of the tool magazines swings out for the change. The panel display uses color to indicate which tools are worn, thus preventing incorrect operation. After the exchange, the magazine swivels back to its starting position and the robot does the rest. To do this, it first puts down its workpiece gripper and picks up a tool gripper. It then removes the worn tool from inside the machine and replaces it with a new one, which it takes from the filled magazine. The entire robot tool change takes less than 90 seconds.

The robots not only load and unload the
machine (pictured here), but also change the tools.
What role does process reliability play in your solution?
This is a decisive economic factor. On the one hand, there is a light band micrometer that determines the final ball and shaft diameters and at the same time detects any chips. All finished components pass through this measurement. Defective components are removed immediately. On the other side, process cameras are in front of the loading doors. With their help, the operator can monitor the machining process via the control panel – the live camera image is displayed here on request. In addition, we have even integrated a parts recognition system on the conveyor belt.
What market opportunities does this solution have in your view?
We are convinced that with the VST 50 is revolutionary because it is twice as fast as conventional production solutions and ultimately ensures significantly lower unit production costs. In addition, measurement outside the workspace is exceptionally accurate and comprehensive; tool change is fully automatic; and finally, our EDNA Apps enables largely intuitive operation, which simplifies the use of the machines. Let me sum it up like this: We are taking ball pin production to a new level.